Two Tiered Animal Themed Cake

Animal Cake  Animals

Last week it was my friend’s little boy’s first birthday and I was really excited to be making his cake for him.

I wanted to start experimenting with tiers so this was a good opportunity for this and I also wanted to make it fun and colourful.

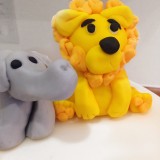
Initially I researched some animal designs online and settled for an elephant and a lion, both were actually quite straight forward – the elephant was extremely simple. I didn’t have orange fondant at home so I used some orange food colouring to tint some white fondant myself which again was very straight forward, although I would recommend using some gloves if possible. My other little saviour was the edible glue which I used to keep the pieces together, a lot of blogs and recipes suggest using some water and a paint brush to attach the fondant pieces however, I am a bit of a worrier and the last thing I would want is a lion’s ear falling off during the party so the glue definitely gave me piece of mind. I also coloured the grey fondant myself for the elephant, for this I used some black food colouring, a much cheaper option than buying grey fondant.

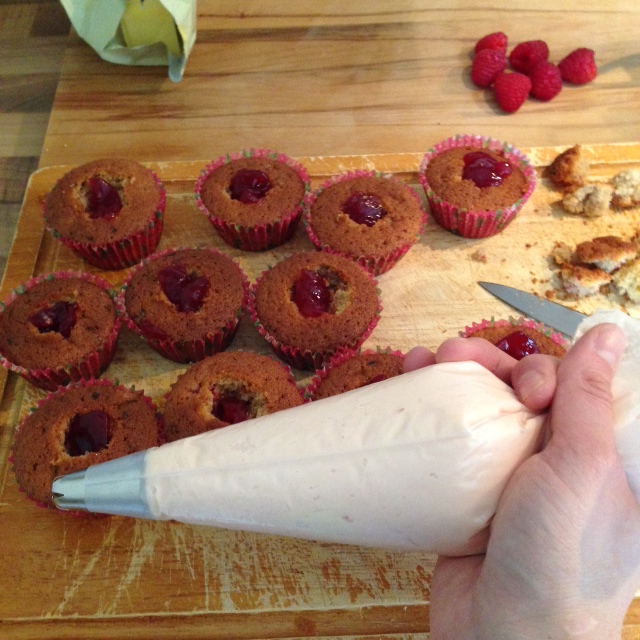
For the sponge I used 2 simple vanilla sponge recipes. The top tier consisted of a light sponge which I use to make my vanilla cupcakes as I wanted this to be as light and fluffy as possible. The base tier was a heavier, dense sponge. The reason for choosing 2 varieties of sponge was because the base had to hold a layer of fondant as well as the weight of the top tier therefore I wanted to make it strong yet still light and fluffy.

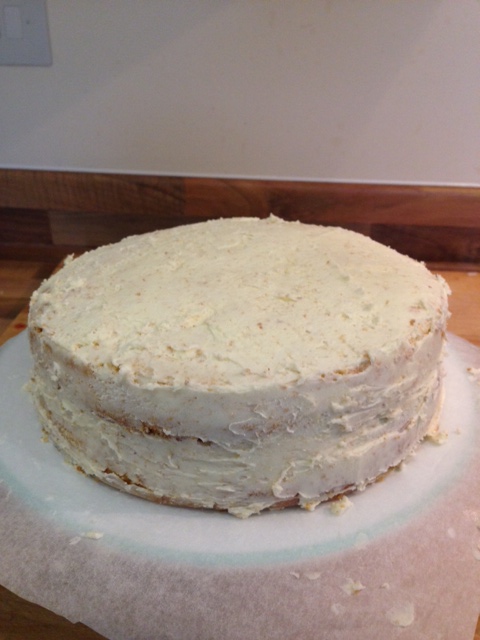
After making both tiers I applied a vanilla buttercream base coat to each and put them in the fridge for around an hour.

As this was my first time stacking 2 cakes I decided to use straws as opposed to dowels because I didn’t have any dowels at home (the straws worked perfectly well) I inserted 8 straws into the base tier, trimming them to make them level and then balanced the smaller sponge on top of the base.

To cover the base layer of the cake I coloured a packet of fondant with blue food colouring, adding drop by drop until I reached the pale blue colour which I was after and a plain white to the top tier before stacking them. In order to make the cakes as smooth as possible I try to apply a thick smooth crumb coat of buttercream and a thick layer of fondant and then smooth it with the base of my hand to make it as smooth as possible.

To make the spots I rolled out some coloured fondant and used two different sized cutters to create small and large circles and affixed these with the edible glue.

The finishing touch was to attach the animals to the top, again with some edible glue.

Navy & White Wedding Cake

Wedding Cake

This is the wedding cake which I made for my friend’s wedding yesterday.

I loved making this cake so much but it was very time consuming, I started it on Tuesday and had it ready by Friday.

I started with the smaller cakes because they took the longest to make so I wanted these out of the way first. I used a deep square cake tin and made a regular vanilla sponge. I then measured out the size of the square and was able to make 9 small squares out of each tin.

I then heated some apricot jam, diluted it with a bit of water and brushed it over each cake to help the icing stick. I used ready to roll icing for each cake. This part was probably the most time consuming trying to get the icing as perfect as possible. I started off quite slowly trying to get the hang of it and by the time I had made around 10 I started to get through them a lot more quickly.

I was looking forward to making the large cake because I had new things to work with which I have never used before. I layered 2 vanilla sponge cakes sandwiching them together with vanilla butter cream and used a thick layer of buttercream to coat the cake and covered it with ready to roll icing.

I ordered a tool online to achieve the quilting effect on the cake, it was really simple and easy to use. I used edible glue for each of the cross over parts in the quilting and attached an ivory sugar ball.

One of the trickiest parts of the cake was attaching the bows and the ribbon as these were separate. After quite a few failed attempts of using the edible glue and trying to figure out how to keep the ribbon on I found that the best method was to tie the ribbon around the centre of the bow in a knot and bring the ribbon around the cake tying it at the back. For the main bow on the big cake I secured to ribbon with double sided sellotape.

The end result was really pleasing and is by far the hardest cake I have made to date but I am definitely looking forward to learning another new style!

Close up of the quilting and the sugar balls
The beautiful bride with her cake

Perfect Sugarpaste Coating

photo (22)

Tips to creating the perfect finish to an iced cake;

  • Mould the paste into a smooth ball making it easier to handle – don’t add any icing sugar to the paste yet as this could affect the consistency
  • Coat your work surface with a thin layer of icing sugar
  • Using a non stick rolling pin roll out the paste ensuring that it is big enough to cover the entire cake and leave an over hang on each side
  • Alternate the sides of the past which you are rolling to prevent the paste from sticking to the surface
  • Drape the paste of the rolling pin
  • Roll the paste over the cake making sure the cake is fully covered and that there is excess paste on each side of the cake
  • Starting from the centre of the cake use a circular motion with your hands moulding the paste onto the cake until your have it fully covered
  • Cut off the excess with a sharp knife
  • To obtain the perfect finish, use your hand to buff the paste using circular motions. This will leave a smooth, perfect finish.

Strawberry Macarons (Macaroon)

photo (21)

It’s been a while since i’ve made some macarons as I have been practicing for some upcoming weddings cakes.

However, I still really want to experiment with new colours and flavours and those who have made macarons will know that as they are so temperamental it’s really important to make them frequently to become good at them.

Im finding that one of the biggest challenges at the moment is adding colour as this affects the consistency of the batter and the cooking time quite dramatically so you have to keep an eye on them as I am finding that the time can vary from anywhere between 12 minutes and 18 minutes.

I kept these ones quite simple by using red food colouring to achieve the pink colour. This meant that I didn’t have to add too much colouring.

I then filled them with strawberry jam instead of a buttercream for a bit of variation.

Rustic Engagement Cake

Rustic Engagement Cake

This is one of my favourite styles of cake and is definitely something which I want to become really good at.

At the moment I am experimenting with a whole host of cakes and becoming really good at wedding cakes is my ultimate aim. Creating wedding cakes which are not only pretty and unique but cakes which taste great too, so for me, the taste is just as important as the overall finish and appearance of the cake.

This actual cake was made for a special occasion. One of my best friends got engaged a few weeks ago and she has asked me to be one of her bridesmaids in Italy next year which I am over the moon about. As I wanted to make this cake anyway I suggested I make it for her engagement party.

For the sponge I stuck with my trusted vanilla sponge recipe which I think is the perfect combination of ingredients. If cooked just right the result is a moist, light and fluffy sponge.

I made three large round cakes and stacked them up, layering with vanilla buttercream. I would usually use jam too but opted for just the buttercream this time.

3 Tier Stacked Vanilla Sponge

I then made a huge batch of my vanilla buttercream recipe. A large amount is needed for this type of cake as I needed to cover the cake with a crumb coat and then have a lot of buttercream to work with to achieve the end result.

For the topping I was initially thinking of using real yellow roses and stacking them on top of the cake (yellow is a potential colour for the bridesmaids) instead I decided to make the roses out of icing. This is something which I have done previously but they didn’t turn out that great so I put in a lot of practice in the days running up to the party to ease the pressure. I used both yellow and white icing and the result was really good.

Handmade Sugar Roses

The preparation of the cake itself was not as stressful as I had anticipated however, I didn’t really think the transportation side of things through and didn’t have a box which was ideal for moving the cake. In the end I found 2 boxes in my garage and I was able to use the first one to hold the cake and the second one to act as a lid.

The journey was really stressful but we got there in one piece and the end result was totally worth it!

photo 3 (3)

Coconut and Raspberry Cupcakes

photo 3 (2)

I made these cakes as a Mother’s Day treat as my mum loves coconut and these are a bit different from your regular cupcake. They also combine two of my favourites techniques – a flavoured centre filling and rose piped icing.

These involve a few more ingredients that your regular cupcake as I added raspberries into the batter so it’s important to ensure that the consistency of the batter is maintained to create a fluffy, light sponge.

With summer only around the corner it’s nice to incorporate nice fresh raspberries into the recipe. I am going to start experimenting with other varieties of fruit in upcoming recipes.

Ingredients

115g Golden Caster Sugar

115g Unsalted Butter

110g Self Raising Flour

15g Cornflour

1/2 Teaspoon Baking Powder

2 large Eggs (free-range or organic)

125g Crushed Fresh Raspberries

Raspberry Jam

Icing

115g Unsalted Butter (at room temperature)

60ml coconut Milk

1tsp Vanilla Extract

500g Icing Sugar (sifted)

Food Colouring of your choice

Desiccated Coconut

Method

This method is really simple, the key with this recipe is using the correct measurement of ingredients and gradually combining the ingredients to prevent curdling.

1. Using a hand whisk cream the butter and sugar together

2. Add the eggs one by one and continue to whisk, adding a small measure of the flour each time to prevent the mixture from curdling

3. Sift all of the remaining ingredients together and add to the mixture, whisking thoroughly

4. Fold in the crushed raspberries

5. Pre-heat the oven to 180 degrees, line a muffin tray with muffin cases and fill roughly 3/4 of the way

6. Bake for approximately 20 minutes until an inserted tooth pick comes out clean

7. Allow to cool for a few minutes in the baking tray before turning out on to a wire rack to cool fully

8. In the meantime, prepare the icing

9. Beat together the butter, coconut milk, vanilla essence and half of the icing sugar

10. Gradually add the remainder of the icing sugar and food colouring of your choice – I chose a few drops of bright pink gel

11. Cut out the centre of the cooled cupcakes and spoon in a small amount of raspberry jam

12. Pipe the icing sugar on top of the cake

13. Finish off by decorating with some raspberries and a sprinkle of the desiccated coconut 🙂

Combine all of the ingredients together
Filled cakes ready for piping

Vanilla Buttercream Icing

Vanilla Buttercream Piped Roses

This is a simple buttercream icing to use as a good base. Start with this recipe and then adapt it to mach your cake with different colourings and experiment with replacing the vanilla with different flavours too!!

Ingredients

500g Icing Sugar (sifted)

115g Unsalted butter at room temperature

60ml Milk

1tsp Vanilla Essence

Method

1. Cream the butter with your electric whisk

2. Add half of the icing sugar

3. Add the milk and vanilla and whisk until smooth

4. Slowly add the remainder of the icing sugar whilst continually whisking

This will leave you with enough buttercream to experiment with some piping techniques

Tips

I like to use Tate & Lyle icing sugar as I find this to be of really high quality. At the moment you can buy a box of this in Lidl for 69p!!

When adding colourings I tend to use a gel as opposed to a liquid to avoid affecting the consistency of the buttercream

you can store the remainder in the fridge in an air tight container for three days. When re-using you may need to whisk it up with a couple of drops of milk

Healthy Oat & Banana Pancakes

Oat & Banana Pancakes

I am always indulging in delicious yet calorific desserts, I have decided to make something a bit more on the healthy side. Inspired by the fact that the sun is out today, reminding me that summer is only around the corner. I have a huge sweet tooth and I don’t believe in leaving out foods which I love, instead I choose to eat them in moderation.

I absolutely love a pancake although I don’t get the savoury thing. It doesn’t seem to sit well with me that you can have a sweet and savoury variation of the same thing. I will occasionally entertain a savoury one just out of curiosity but sweet is always the one for me!

These pancakes are so quick and easy and only take a few ingredients to make them.

Ingredients

100g Quaker Oats

2 Medium Eggs

250ml Almond Milk

1tsp Vanilla Extract

Sprinkle of Cinnamon

Method

So easy….

1.Put all of the ingredients into a bowl an whisk them together

2. Heat some olive oil in a pan

3. Use a ladle to spoon in a measure of the mixture into the pan

4. Flip and serve with a topping of choice…..I chose Nutella 🙂

Simple Layered Cake

  photo 5

I’m making my friend’s wedding cake for her in a couple of months’ time. This is the first (of many I hope) that I have aver made and am hoping that this is something which I can become really good at.

As I have never made one before I thought it was about time I started practising.

To begin with I decided to keep it simple so I started with an easy vanilla sponge which is a fool proof recipe for any type of cupcake or sponge. I made 2 separate cakes in a round cake tin and layered them on top of each other using vanilla buttercream and raspberry jam.

This is also the first time I have attempted to do both a crumb coat and a full cake covering with rolled out icing.

I really want to master this and feel confident as I will probably fall in to panic mode in the run up to the wedding!

Ingredients

These are the ingredients for one sponge cake as I made one at a time (I only had one round cake tin) so you will want to double these measurements up so you can make 2!

Sponge

125g Caster Sugar

125g Unsalted Butter (at room temperature)

2 Medium Eggs whisked

125g Self Raising Flour (sifted)

2tbsp Semi Skimmed Milk

1tsp Vanilla Essence

Buttercream

250g Icing Sugar (sifted)

55g Unsalted Butter

30ml Semi Skimmed Milk

1tsp Vanilla Essence

Additional

1tbsp Raspberry Jam

Ready to Roll Icing

Method

1. To make the sponge whisk together the caster sugar and the butter until creamy

2. Slowly whisk in the eggs, adding a spoonful of the flour to prevent the mixture from curdling

3. Fold in the remaining flour with a metal spoon and then mix in the milk and vanilla extract

4.  Line an 8 inch round tin with greaseproof baking paper. Add the mixture and pop into a preheated oven of 180 degrees (fan) for 18/20 minutes, or until an inserted toothpick comes out clean

5. Let the cake cool before sliding off onto a wire rack to cool further

6. Repeat this process so you have 2 cakes

7. To make the buttercream, whisk together the sifted icing sugar and butter and then slowly add the milk and vanilla extract

8. Even out the top of each of the cakes by thinly slicing off a thin layer with a sharp knife

9. On top of the one cake used a pallet knife to smooth over a thin layer of the buttercream and then smooth the jam on top of the buttercream

10. Balance the other cake on top ensuring that they are even

11. Apply a crumb coat to the entire cake and then refrigerate for around 30 minutes

12. Roll out the icing and use your rolling pin to apply the icing to the cake

13. Smooth down the edges and cut off any excess icing with a sharp knife

14. Garnish with some sliced strawberries

Slice off the top of each layer of the cake to create a smooth, even layer
Apply a crumb coat to the cake using my vanilla buttercream recipe
Garnish with sliced strawberries
Beautiful
Beautiful