

I have set up a page on Facebook where I will be showcasing all of my recipes, focusing in particular on cakes and macarons.
I have loads of exciting upcoming projects and experiments in mind so search for Baked By Sarah
Thank you 🙂
I have set up a page on Facebook where I will be showcasing all of my recipes, focusing in particular on cakes and macarons.
I have loads of exciting upcoming projects and experiments in mind so search for Baked By Sarah
Thank you 🙂

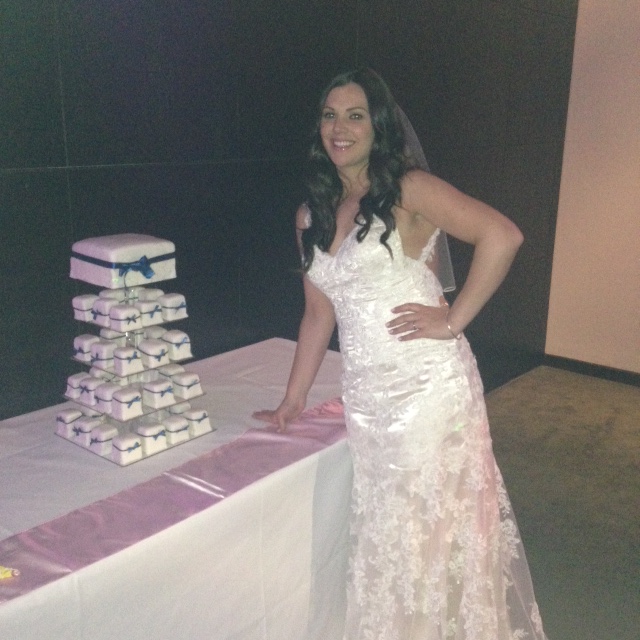
This is the wedding cake which I made for my friend’s wedding yesterday.
I loved making this cake so much but it was very time consuming, I started it on Tuesday and had it ready by Friday.
I started with the smaller cakes because they took the longest to make so I wanted these out of the way first. I used a deep square cake tin and made a regular vanilla sponge. I then measured out the size of the square and was able to make 9 small squares out of each tin.
I then heated some apricot jam, diluted it with a bit of water and brushed it over each cake to help the icing stick. I used ready to roll icing for each cake. This part was probably the most time consuming trying to get the icing as perfect as possible. I started off quite slowly trying to get the hang of it and by the time I had made around 10 I started to get through them a lot more quickly.
I was looking forward to making the large cake because I had new things to work with which I have never used before. I layered 2 vanilla sponge cakes sandwiching them together with vanilla butter cream and used a thick layer of buttercream to coat the cake and covered it with ready to roll icing.
I ordered a tool online to achieve the quilting effect on the cake, it was really simple and easy to use. I used edible glue for each of the cross over parts in the quilting and attached an ivory sugar ball.
One of the trickiest parts of the cake was attaching the bows and the ribbon as these were separate. After quite a few failed attempts of using the edible glue and trying to figure out how to keep the ribbon on I found that the best method was to tie the ribbon around the centre of the bow in a knot and bring the ribbon around the cake tying it at the back. For the main bow on the big cake I secured to ribbon with double sided sellotape.
The end result was really pleasing and is by far the hardest cake I have made to date but I am definitely looking forward to learning another new style!


Tips to creating the perfect finish to an iced cake;
